How To Assemble A Speargun

Investing in a speargun that is suited to your needs is essential in your spearfishing success. If you're keen to make sure your speargun gets the best fit and customisation, we've prepared a step by step guide on how to assemble a speargun:
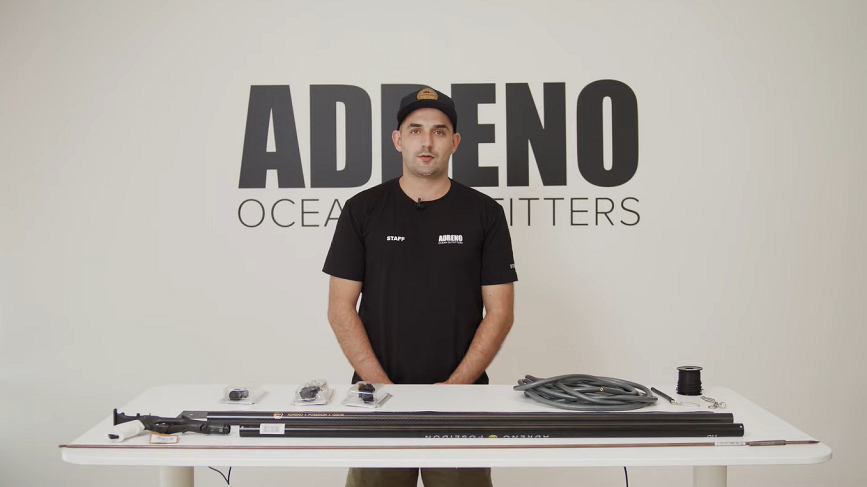
What you’ll need:
- 2.6mm shark clip with swivel
- 1.9mm waxed Dyneema
- Ascension Barrel Sticker
- 1.10 aluminum Poseidon Barrel
- 7mm shaft in 160cm Adreno F.G shaft
- Microbore OPTIBAND rubbers
- Standard South African muzzle bungee
- Adreno Poseidon open muzzle
How To Assemble A Speargun Step By Step Guide:
Step 1: Stick the barrel sticker on.
To do that, remove the stickers on the barrel. Give it a quick rubdown with some isopropyl alcohol so the sticker sticks well, and then lay the sticker flat and sit the barrel down centered on it. Next, wrap that sticker around the barrel. These stickers usually peel off pretty easily and don't leave too much residue.
Now that you’ve got your stickers off, you've got a nice clean black barrel. Give it a quick spray with the rubbing alcohol. Clean it up and wipe it down. Once you've done that, you want to avoid handling the barrel until you’re ready to put the sticker on. Peel the backing off the sticker. Make sure you have a nice clean workspace for this to avoid any dirt underneath.
You’ll notice one end of the sticker has a hole in it for hanging it up in the shop, cut that off at the end. The start of the sticker should line up with the end of the barrel that has the two holes for the handle.
Step 2: Wrap the sticker around.
It would be a good idea if you could get someone to help you at this point. It's a little bit tricky. Once you’ve got the sticker in the center of your barrel, you need to wrap it around. Bring it off the edge of the table. Starting from the center, wrap it around your barrel. See if there's any bubbles in that you might have missed.
Step 3: Trim it down.
Cut the end bit off the excess length using a sharp cutter. Run the blade flat along the track and do one side at a time. Now you’re ready to chuck our muzzle and your handle on.
Step 4: Connect the muzzle to the handle.
The handle's going to come in two small stainless steel screws and one rubber O-ring. With an open muzzle, just a single screw and another rubber O-ring. Make sure that the muzzle and handle fits perfectly. If you do find you've got a little bit of wiggle movement when you fit your handle or your muzzle, make sure to chuck the O-ring on there. If it fits too tight, you can use a bit of silicon grease, just make sure it gets in there nice and easy. You want to make sure that track from the handle actually lines up with the rail in the barrel as well. These handles are pre-drilled centers, so you shouldn't be able to put the screws in unless it's lined up correctly.
Working on the muzzle is pretty much the same thing, just the other end of the gun. And you’ve only got one screw this time. Again, you can apply a little bit of silicon grease, just to make sure it slides in nicely. Line up the track in the muzzle with the rail of the barrel. Once you've got the track lined up, flip it over and find the screw hole.
Step 5: Rig the shaft
For this tutorial, the speaker uses a 160cm, 7mm spring stainless steel Adreno F.G shaft for the rig. The shaft comes in a tri-cut tip, welded flopper pins, and is very well-tuned.
Attach your muzzle bungee to the muzzle. It’s a pretty small hole so you've got a single strand of Dyneema that you're going to pass through and use that to pull the muzzle bungee Dyneema back through. You can see a little hole at the end of your muzzle, run that through. Pass it through the muzzle bungee loop. Now that your muzzle bungee is on, you can now put the mono on our shaft, doing the full rig.
Step 6: Put the mono on the shaft.
Before you start, put a nice cut on the end of your mono so it's easy to pass through the crimp. If it’s squished or crushed, you'll really struggle getting it through the copper double-barrel crimps. Pass it through the back and back through the crimp. You can burn a little blob on the end for additional security. It also keeps the flame away from your shooting line.
You don't want the loop to be too short, because that'll end up crushing in the mech, and that crush point will be a weak point as well. Quite often, you'll see the big fish, the mono will snap at the shaft. So you want to leave a nice long loop, probably 6 or 7cm should be adequate for this one. Just crimping once at each end. Nothing over the top.
Step 7: Make the bridles
The next step would be the rubbers. For the robbers, the speaker in the video uses Microbore OPTIBAND Rubber from USA Latex, running two 14s at around 65cm that has a low recoil, easy to load and set up. For the bridles, use some 1.9mm waxed Dyneema. It's really hard-wearing and tends to outlast rubbers.
Take about 20cm of Dyneema. Tie a small stopper knot at each end. Use a little figure-eight knot on both ends. At one end, and probably like the bridle length out of the rubber to be about 60mm, 6cm. So the total length you want there is about 80mm. It's going to have a little bit inside the rubber. Tie the knot and cut the tag end.
Now you’ve got your bridles made. Cut the rubber down to length. Make sure you've got a pretty good flat end to start with there. Put the bridles into the rubber, a little bit of silicone grease on each end to make it easier to get in. Push it down about 10mm, 20mm. Just give plenty of room to tie your constrictor knot. Just make sure you don't put this one fully together yet. You've got to put it in the gun first.
Attach the other side of the rubber to the bridle using the same process with the previous one. Now to tie the constrictor knots. Get 4 pieces of 35cm constrictor lines then tie a loop in each end. That's just to help tighten the knot down after.
Now you’re ready to tie the constrictor knots. Once done, slide them down to the end and cinch them off tight. Slide it down, bed the knot in, just putting a little bit of tension on it so it can't move. Grab a screwdriver or a bridle tool punch, any other object you can get through your loops and use these to pull it tight.
Step 8: Add shark clip and swivel to the handle.
One final step in assembling a speargun: add a simple shark clip and swivel to the handle. So you’ve got somewhere to attach your float line. To attach this, use again 1.9 wax Dyneema and tie off with a double opposing noose knot, about 60cm line.
Pass through the little connection in the bottom of your handle. Once through there, through the shark clip, loop back through the handle, then back through the shark clip. Now you've got two loops running through and two tag ends. Tie the opposing nooses, one on each end. Pull each noose tightly using pliers and trim the ends off. Once the shark clip is attached you can now connect the speed spike or straight into a float line. Now you have your finished gun.
Got your own Adreno spear rig too? Use the hashtag #pimpmyspeargun on Instagram and tag Adreno in your post. We're going to be giving out a $100 voucher every month for the best pimped out spearguns!